Free shipping £150+ Orders
Your Guide to a Glycolic Acid Peel at Home
A glycolic acid peel at home is a powerful way to chemically exfoliate your skin, using glycolic acid to dissolve the “glue” that holds dead, dull cells to the surface. It’s one of the best things you can do to get a brighter, smoother complexion right from your own bathroom—no clinic appointment necessary.
What a Glycolic Acid Peel Actually Does for Your Skin
Before diving in, it’s worth getting a quick refresher on what glycolic acid is and how it works. I like to think of the top layer of our skin like a brick wall: the skin cells are the bricks, and a sticky mortar holds them all together. Glycolic acid simply melts away that mortar.
This action allows the old, discoloured, and rough skin cells to slough off, making way for the fresh, vibrant cells underneath. And because glycolic acid has the smallest molecule size of all the Alpha Hydroxy Acids (AHAs), it gets into the skin quickly and effectively, which is why it delivers such noticeable results.
The Key Benefits You Can Expect
When you perform a glycolic acid peel at home, you’re doing much more than just scrubbing your face. You’re kick-starting a genuine skin renewal process that goes beyond the surface.
Here’s a realistic rundown of what you can achieve:
- Smoother Skin Texture: By whisking away that top layer of rough, dead cells, your skin will feel incredibly soft and refined to the touch.
- Brighter, More Even Tone: Peels are fantastic for fading dark spots, old acne marks, and patches of hyperpigmentation, leaving you with a much more even-toned complexion.
- Reduced Appearance of Fine Lines: With consistent use, glycolic acid encourages your skin to produce more collagen, which helps plump and soften the look of fine lines.
- Unclogged Pores: For anyone with acne-prone skin, this is a huge plus. The peel helps clear out the gunk and oil trapped in your pores, which often means fewer breakouts.
To give you a clearer picture, I’ve put together a quick summary table.
Glycolic Acid Peel At a Glance
| Aspect | Description |
|---|---|
| Primary Goal | Chemical exfoliation to remove dead skin cells and promote cell turnover. |
| Best For | Dullness, uneven skin tone, fine lines, rough texture, and clogged pores. |
| Key Ingredient | Glycolic Acid, an Alpha Hydroxy Acid (AHA) derived from sugar cane. |
| Expected Sensation | A mild to moderate tingling or itching sensation during application is normal. |
| Immediate Results | Skin often appears brighter and feels smoother immediately after one use. |
| Long-Term Results | Fading of hyperpigmentation, softer fine lines, and a more radiant complexion. |
This table shows just how versatile a glycolic acid peel can be. It’s a true multi-tasker for achieving healthier-looking skin.
Setting Realistic Expectations for At-Home Peels
It’s really important to manage your expectations here. An at-home peel is not the same as a high-octane treatment you’d get from a dermatologist. To keep things safe for home use, these products contain lower concentrations of acid. This means the results are more gradual and build up over time with consistent use.
This accessibility has made at-home treatments a huge part of modern skincare. In fact, consumer interest is so strong that the UK’s glycolic acid market is projected to make up about 18.5% of the global share by 2025. It shows just how many of us are turning to effective, at-home exfoliation.
If you’re curious about how these peels fit into the broader world of professional treatments, our guide on https://averacosmetic.com/the-ultimate-guide-to-cosmetic-grade-peels-unlock-your-skins-radiance-in-2024/ is a great next step. Think of an at-home glycolic peel as your first step toward achieving that clinic-level glow, with care and consistency being your secret weapons.
Getting Your Skin Ready for a Peel
The success of your at-home glycolic peel is decided long before you even open the bottle. Think of this preparation phase as your insurance policy against irritation and the key to getting that incredible glow you’re after.
Properly prepping your skin ensures it’s calm, strong, and ready to accept the acid. If you skip this, you’re setting yourself up for potential over-exfoliation, sensitivity, and results that are far from ideal. Let’s walk through how to get it right.
One Week Out: Halt All Other Exfoliation
This is the golden rule. You must stop using all other forms of exfoliation at least five to seven days before your planned peel. Your skin can only handle so much, and pushing it past its limit is a recipe for disaster.
Put these products on pause for the week:
- Retinoids: This means everything from prescription tretinoin to over-the-counter retinol and retinaldehyde.
- Other Acids: Shelve your salicylic acid cleansers, lactic acid toners, and any other AHA or BHA products.
- Physical Scrubs: No face scrubs, cleansing brushes, or abrasive cloths.
Using these right up until peel day seriously compromises your skin’s protective barrier. A weakened barrier makes your skin far more likely to react poorly—we’re talking irritation and even potential burns from the glycolic acid. You want your skin as resilient as possible when you apply the peel.
The Patch Test: Your Most Crucial Step
If you only take one piece of advice from this entire guide, let it be this: always, always do a patch test. This is your non-negotiable safety check. It’s a small trial run to see exactly how your skin will react to that specific peel’s strength and formula before you apply it to your entire face.
It’s simple, and it can save you from a world of trouble. Don’t be tempted to skip it, even if you’ve used glycolic acid before. Every formula is different.
Pro Tip: Perform your patch test 24 to 48 hours before you plan to do the full peel. This gives your skin enough time to reveal any delayed reactions, like intense redness, swelling, or blistering.
To do it properly, apply a tiny amount of the peel solution to a discreet spot, like just behind your ear or on your inner arm. Follow the exact timing instructions for the peel (if it says one minute, time it for one minute), then neutralise and rinse it off just as you would during the real application. Keep an eye on that spot for the next day or two for any warning signs.
Setting Up Your Peel Station
Getting everything you need laid out and within arm’s reach will make the whole process feel calm and controlled. The last thing you want is to be scrambling for a neutraliser while acid is tingling away on your face.
Here’s your essential checklist:
- Gentle Cleanser: You need a clean canvas, free from oil and makeup. A basic, non-exfoliating, pH-balanced cleanser is what you’re looking for.
- Glycolic Acid Peel Solution: Your chosen product.
- Protective Barrier: A thick ointment like Vaseline or Aquaphor to shield sensitive spots like the corners of your eyes, nostrils, and lips.
- Applicator: A small fan brush or even a cotton pad will work for an even application.
- Timer: Your phone timer is perfect. Don’t try to guess the timing—precision is key.
- Neutraliser: This is often a simple mix of bicarbonate of soda (baking soda) and water, though many kits include a dedicated neutralising spray. This is not an optional step.
- Cool Water & Soft Cloths: To gently rinse everything away.
- Soothing Post-Peel Care: Have a simple hydrating serum (like hyaluronic acid) and a bland, calming moisturiser ready to go. No active ingredients!
The demand for effective treatments for acne, fine lines, and hyperpigmentation has made chemical peels incredibly popular. In fact, market analysis shows the global chemical peel market is projected to grow by 4.2% to 5.6% between 2025 and 2035, driven largely by the rise of at-home solutions. You can discover more insights about the chemical peel market growth and its drivers. This growing trend just goes to show how important it is to master these safe application techniques.
The At-Home Glycolic Peel: Step-by-Step Application
Alright, you’ve done your prep work, your supplies are laid out, and you’re ready to go. This is where your careful planning pays off. Don’t rush this part. Think of it as a focused, almost meditative, part of your skincare routine. The whole point is a safe, controlled application that leads to that renewed glow we’re all after.
Let’s walk through this moment by moment, from the very first cleanse to the crucial final rinse. Following these steps will help you feel confident and in control from start to finish.
This visual breaks down the essential prep work you should have already completed before you even think about opening your peel solution.
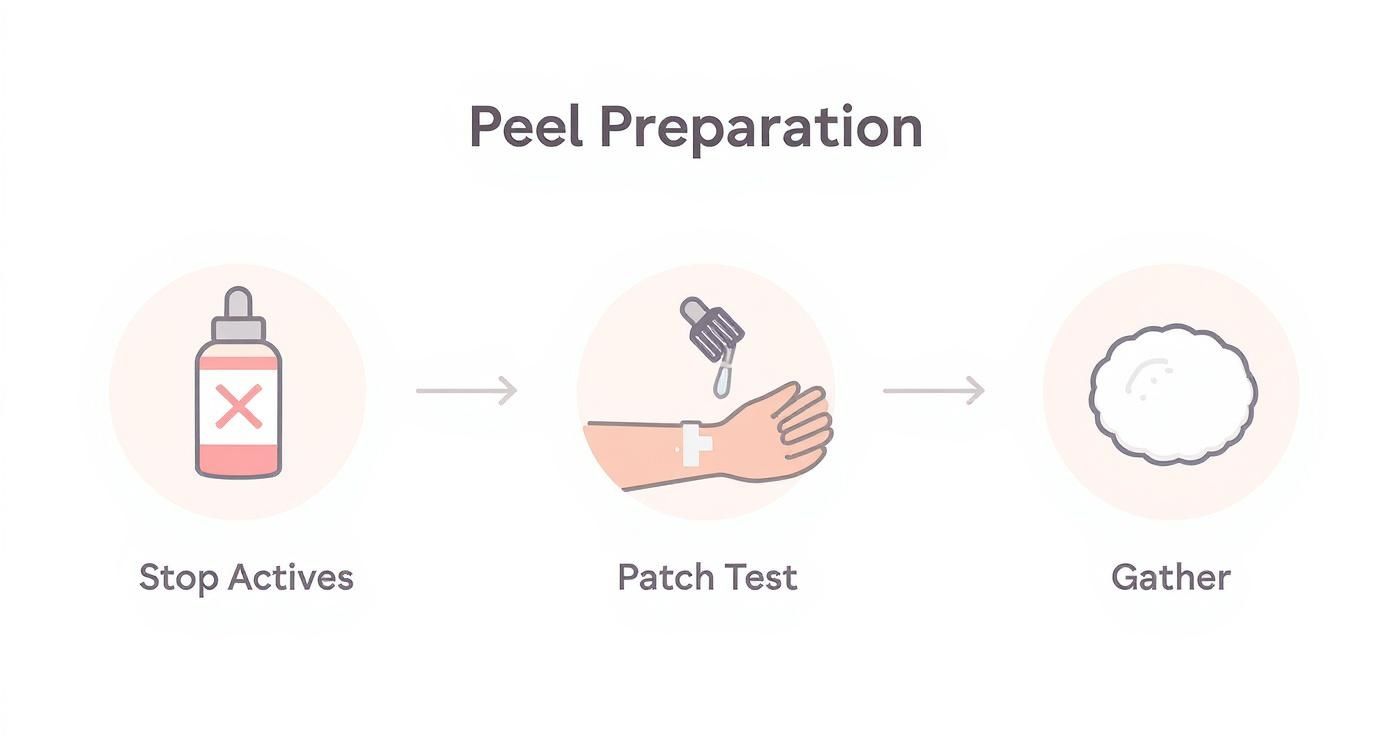
As you can see, stopping your usual actives, doing that non-negotiable patch test, and getting your tools in order are the absolute foundations for a successful at-home peel.
Starting with a Clean Slate
First thing’s first: you need a perfectly clean face. Every last bit of makeup, sunscreen, and daily grime has to go. This ensures the glycolic acid can get to work evenly across your skin without any barriers.
Reach for a gentle, pH-balanced cleanser that doesn’t exfoliate. This means no scrubs, beads, or other acids for this step. We don’t want to pre-sensitise the skin right before the main event. Once cleansed, pat your skin completely dry with a soft, clean towel. Any lingering dampness can dilute the acid, making the peel’s strength unpredictable.
Next up is a simple but vital trick: protecting the delicate areas. Grab a thick, occlusive ointment like Vaseline or Aquaphor and create a barrier around the spots that are most vulnerable to irritation.
Be sure to cover:
- The corners of your eyes
- The thin skin right underneath your eyes
- The little creases around your nostrils
- The corners of your lips
- Any healing blemishes or broken skin
These spots have thinner skin and are much more likely to react, so this little bit of prep makes a huge difference.
Applying the Glycolic Acid Solution
Now for the main event. Pour a small amount of the glycolic solution into a little glass dish. Using your chosen applicator—a cotton pad or, even better, a small fan brush—start applying a thin, even layer to your face.
A dedicated fan brush for peels gives you fantastic control for a smooth, consistent layer. My advice is to start on the tougher areas of your face first, like your forehead, cheeks, and chin. Then, move to the more sensitive parts, like your nose and above your upper lip. You want to work quickly but deliberately, carefully avoiding the protected spots you just covered.
Crucial Timing Advice: The first time you do this, set a timer for 30 to 60 seconds. Seriously. This is not the time to be a hero. The goal of your first peel is simply to see how your skin reacts, not to achieve a massive transformation overnight.
Once the solution is on, you’ll definitely feel something. A bit of tingling, a mild itch, or a feeling of warmth is totally normal—it’s the acid getting to work dissolving the “glue” that holds dead skin cells together. But it’s essential to know the difference between a normal tingle and a warning sign.
A manageable, “spicy” sensation is fine. A sharp, burning, or genuinely painful feeling is your skin screaming “stop!” If it crosses that line from tingling to burning, do not wait for the timer. Go straight to the neutralising step.
Neutralising and Rinsing The Peel
As soon as that timer pings, it’s time to stop the chemical reaction. That’s what your neutraliser is for. It rapidly raises the skin’s pH, deactivating the acid and bringing the exfoliation process to a halt. This step is absolutely mandatory.
If a neutralising solution came with your peel, use it exactly as instructed. If you’ve mixed your own with bicarbonate of soda and water, splash or wipe it generously over every area the acid touched. You might feel a slight fizzing or see a bit of foaming. That’s perfectly normal; it’s just the acid and base reacting.
Let the neutraliser sit on your skin for about 60 seconds to be sure it has done its job thoroughly.
Finally, it’s rinsing time. Use cool water—not hot, not freezing cold—and splash your face over and over for at least a full minute. We want every trace of the peel and the neutraliser gone. Don’t rub your skin. When you’re done, gently pat your face dry with the softest, cleanest towel you own. It’s normal for your skin to look a little pink or flushed at this point. Now, it’s perfectly prepped for the soothing, hydrating aftercare that comes next.
Mastering Post-Peel Aftercare for Radiant Results
The success of your at-home glycolic peel doesn’t end when you wash it off. In fact, what you do in the hours and days that follow is arguably even more crucial than the application itself.
Your skin has just had a major workout. It’s vulnerable, thirsty, and primed for healing. Think of this phase as nurturing the delicate new skin you’ve just worked so hard to reveal. Get this part right, and you’ll get that smooth, glowing result you were hoping for. Skip it, and you risk irritation and disappointment.
Your Immediate Post-Peel Recovery Kit
Once you’ve neutralised the acid and rinsed your face, your skin is practically begging for two things: soothing hydration and barrier support. The immediate goal is to calm any redness and start replenishing the moisture your skin has lost during the peel.
Keep it simple. This is not the time for your ten-step routine or potent active ingredients. Your focus should be on gentle, deeply hydrating formulas.
Go-To Ingredients for Immediate Soothing:
- Hyaluronic Acid: A true hydration hero. It can hold up to 1,000 times its weight in water, drenching your freshly exfoliated skin with moisture without a hint of irritation.
- Ceramides: These are the natural fats in your skin that form its protective barrier. Applying them topically helps rebuild your skin’s defences when they’re at their weakest.
- Glycerin: A reliable classic for a reason. This humectant draws moisture into the skin, keeping it soft and comfortable while it recovers.
As soon as you’ve patted your face dry, reach for a gentle hydrating serum. A product like a post-peel moisturizing hyaluronic serum is perfect because it’s specifically formulated to deliver that intense, calming hydration without any risky additives. Follow it up with a plain, no-frills moisturiser to seal everything in.
The Non-Negotiable Rules of Aftercare
For the next three to five days, your skincare routine needs to be stripped back to the bare essentials. Your skin’s barrier is temporarily compromised, which means it can react to products it would normally handle just fine.
What you don’t put on your skin is just as important as what you do. Stay away from anything that could challenge your healing skin—that includes other exfoliants, harsh cleansers, and even excessively hot water in the shower.
What to Avoid Post-Peel:
| Category | Specifics to Avoid | Why It Matters |
|---|---|---|
| Active Ingredients | Retinoids, Vitamin C, other AHAs/BHAs, benzoyl peroxide. | These can seriously over-exfoliate your sensitised skin, leading to major redness and inflammation. |
| Physical Exfoliation | Face scrubs, cleansing brushes, rough face cloths. | Your skin has just been chemically exfoliated. Any physical scrubbing will be far too harsh. |
| Bad Habits | Picking at flaky skin, touching your face unnecessarily. | This is a fast track to scarring and hyperpigmentation. Let the skin shed on its own terms. |
This ‘less is more’ approach gives your skin the space it needs to focus all its energy on healing, which is exactly what leads to that incredible post-peel glow.
Sun Protection: The Ultimate Aftercare Step
If you only remember one thing from this guide, let it be this: you must wear a broad-spectrum sunscreen with SPF 30 or higher every single day. This is completely non-negotiable.
The new skin cells you’ve just uncovered are incredibly vulnerable to UV damage. Without proper protection, you risk undoing all the benefits of your peel and could even end up with worse hyperpigmentation than when you started. Slather on sunscreen generously every morning, even on cloudy days, and don’t forget to reapply if you’re spending significant time outdoors.
The demand for at-home treatments is booming as more people seek professional results without the clinic visit. In fact, by 2025, the global glycolic acid product market is predicted to hit around USD 438.6 million. This surge just highlights how important it is to master safe and effective aftercare to truly get the benefits you’re looking for from products like these.
Common Mistakes to Avoid with Your At-Home Peel
When you’re working with a powerful treatment like a glycolic acid peel at home, it’s easy to make a small misstep, especially in the beginning. Knowing the common pitfalls ahead of time can be the difference between glowing success and a week spent babying unhappy skin.
Let’s get one of the biggest mistakes out of the way first: leaving the peel on for too long, too soon. I see this all the time. It’s so tempting to think that an extra minute will give you better results, but with chemical exfoliants, that logic backfires spectacularly. Your first peel is a trial run, not a final performance. Stick strictly to that 30-60 second window to gauge your skin’s tolerance.
Another classic slip-up is jumping in at the deep end with a concentration that’s way too strong. Starting with a high-percentage peel before your skin is ready is like trying to run a marathon without training. You’re just setting yourself up for irritation and redness that could have been completely avoided by starting low and going slow.
Misinterpreting Your Skin’s Reaction
Learning to speak your skin’s language during and after a peel is a crucial skill. It’s easy to either panic at perfectly normal sensations or, conversely, ignore genuine warning signs.
A mild, “spicy” tingle? A bit of warmth? That’s normal. It just means the acid is getting to work. But a sharp, stinging, or burning feeling is your skin screaming “Stop!” If you feel that, don’t wait for the timer. Neutralise immediately.
Post-peel confusion is also common, especially when you don’t see any flaking.
A huge misconception is that a peel hasn’t “worked” unless you see visible shedding. That’s simply not true. Many effective at-home peels do their job on a microscopic level, dissolving dead cells without dramatic flaking, especially with lower strengths.
Judge your peel’s success by the improvements you see in texture, clarity, and brightness over the following days, not by the amount of skin you shed.
Forgetting Key Steps in the Process
When you’re focused on the main event—applying the acid—it’s surprisingly easy to overlook other vital steps.
Skipping the neutraliser is probably the most dangerous mistake you can make. If you don’t neutralise, the acid just keeps on working, which can lead to nasty chemical burns. Make sure you apply your neutraliser thoroughly for a full 60 seconds before you even think about rinsing.
Picking at flaky skin is another major no-no. It’s tempting, I know, but you have to resist. Pulling off skin that isn’t ready to come off can easily lead to scarring and dark spots (post-inflammatory hyperpigmentation). Just let your skin do its thing.
Finally, don’t panic if you get a few spots after a peel. This is often just skin purging, where the rapid cell turnover pushes underlying gunk to the surface. It’s temporary. However, if you experience a severe breakout with lots of inflammation, that’s more likely an irritation response, telling you the peel was too strong or left on too long.
Your Glycolic Acid Peel Questions, Answered
It’s completely normal to have a few lingering questions, even with a solid plan. When you’re dealing with something as potent as a glycolic acid peel at home, you want to be sure you’ve covered all your bases. Let’s run through some of the most common queries I hear, just to make sure you feel confident and ready.
How Often Can I Actually Do a Peel?
This is probably the number one question, and the honest answer is: it depends. There’s no single correct schedule. The right frequency comes down to two things: the strength of the peel you’re using and how your own skin responds.
For the gentler peels, say in the 10-20% glycolic acid range, you might work your way up to doing one every two to four weeks. But for the stronger stuff, like a 30% solution or higher, you really need to give your skin more recovery time. Spacing those treatments out to every four to six weeks is a much smarter, safer bet.
The golden rule? Listen to your skin. If it still feels a bit tender or looks flushed a week later, it’s not ready for another round. Pushing it too soon is a recipe for irritation.
Is a Glycolic Peel Safe for Sensitive Skin or Rosacea?
This is where we need to be extremely careful. If your skin is just generally a bit sensitive, you might be able to tolerate a very low-strength peel (I’m talking under 10%). But you absolutely must do a thorough patch test first and proceed with caution. It’s a fine line.
However, if you have an active skin condition like rosacea or eczema, an at-home glycolic peel is a hard “no.” These conditions mean your skin’s protective barrier is already compromised. Hitting it with a powerful acid is almost guaranteed to cause a major flare-up, leaving you with more redness, inflammation, and discomfort than you started with.
For anyone with underlying skin conditions or those wanting more dramatic results, leaving it to the experts is the best path. While this guide is for at-home use, professional chemical peel treatments can be a much safer and more effective alternative in these cases.
It’s also worth noting that chemical peels are off-limits if you’re pregnant or breastfeeding. And, of course, never apply a peel to skin with open sores, cuts, or any kind of infection.
Aren’t Peels and Toners Just the Same Thing?
It’s an easy mistake to make. You see “glycolic acid” on both bottles and assume they’re interchangeable, but they play completely different roles in a skincare routine. Knowing the difference is crucial for using them correctly and safely.
A daily glycolic toner is your maintenance product. It provides a low-dose, gentle nudge of exfoliation to keep your skin bright and clear day-to-day. Think of it as keeping things ticking over nicely.
A glycolic acid peel at home, however, is an intensive treatment. It’s formulated with a much higher concentration of acid to deliver a real resurfacing effect—something a daily toner could never achieve.
Here’s how they stack up:
| Feature | Glycolic Acid Toner | Glycolic Acid Peel |
|---|---|---|
| Purpose | Daily upkeep & gentle exfoliation | Periodic deep resurfacing & renewal |
| Concentration | Low (usually 2-8%) | High (10-50% or more) |
| Frequency | Daily or several times a week | Every 2-6 weeks |
| Application | Wiped on and left on the skin | Applied for a specific, timed period |
| Required Steps | None | Mandatory neutralisation and rinsing |
A good analogy is exercise. Your toner is like a daily walk—it keeps you healthy and active. The peel is your high-intensity workout session that pushes your limits to make significant gains. You wouldn’t do an intense workout every single day; you’d end up injured. Both are great for your skin’s overall fitness, but they serve very different purposes.
Ready to begin your journey to brighter, smoother skin? The key is using high-quality, reliable formulations. Avera Cosmetic offers a curated selection of professional-grade skincare solutions, including a range of chemical peels designed to deliver visible results safely. Explore our collections and find the perfect match for your skincare goals at https://averacosmetic.com.